Rabu, 15 Juni 2011

Foto Gerhana Bulan Total

Alhamdulillaah, . Meskipun tidak keseluruhan karena terganggu cuaca yang mendung, foto-foto gerhana bulan di separuh awal dan saat akhir gerhana dapat terekam oleh kamera.
Berikut adalah beberapa gambar atau foto gerhana bulan Juni 2011 yang bisa disajikan di blog  ini.
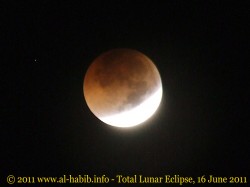
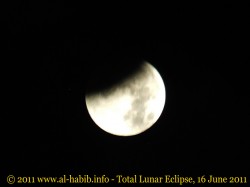
foto gerhana bulan 16 juni 2011 awal www.al habib.info  250x187 Foto Gerhana Bulan Total 16 Juni 2011
Foto gerhana bulan total, 16 Juni 2011. Awal gerhana.

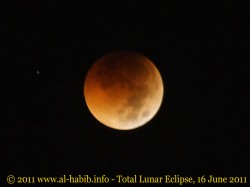
foto gerhana bulan 16 juni 2011 memasuki total www.al habib.info  250x187 Foto Gerhana Bulan Total 16 Juni 2011
Foto gerhana bulan total, 16 Juni 2011. Memasuki totalitas gerhana.
foto gerhana bulan 16 juni 2011 total www.al habib.info  250x187 Foto Gerhana Bulan Total 16 Juni 2011
Foto gerhana bulan total, 16 Juni 2011. Masa totalitas gerhana. Bulan merah jingga.
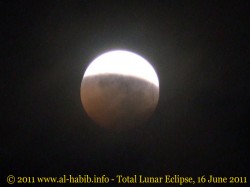
foto gerhana bulan 16 juni 2011 akhir www.al habib.info  250x187 Foto Gerhana Bulan Total 16 Juni 2011
Foto gerhana bulan total, 16 Juni 2011. Gerhana bulan mulai berakhir.

Selama pengambilan gambar, takbir bergema dari beberapa masjid. Dzikir dan doa pun terlantunkan. Sungguh besar kekuasaan Allah: “Ya Rabb kami, sungguh Engkau tidak menciptakan ini dengan sia-sia. Maha Suci Engkau, maka peliharalah kami dari siksa neraka.” Aamiin.

Senin, 13 Juni 2011

desai pin acrilic SMAK Makassar

Jumat, 10 Juni 2011

Desain logo SDIT Cendikia 4

Desain logo SDIT Cendikia 3

Desain logo SDIT Cendikia 2

desain logo SDIT CENDIKIA 2

Ada beberapa desain logo yang saya tawarkan akhirnya desain berikut yang disetujui:

Desain logo SDIT Cendikia School Makassar-1

Kamis, 09 Juni 2011

Tutorial Logo 3 Dimensi

1.3D Text


Use the Type tool, type in “3D Logo”. Go to Effect >Warp > Arc and apply the following settings:


2.3D Extrude & Bevel


Then go to Effect > 3D > Extrude & Bevel and apply the setting as shown in the image below. You can drag around the cube to set the X,Y,Z rotation values. Set the Extrude Depth to 20pt.


3.Expand Appearance


Now go to Object > Expand Appearance to remove all effects and convert to paths. After the text object is expanded, Ungrounp the object by Object > Ungroup or pressCtrl+Shift+G. You probably need to do Ungroup 4-5 times in order to break the object apart.


4.Merge Paths


Select the round corner paths and merge them together by using the Pathfinder tool. Hold down Alt key, click on the Add to shape area to merge the selected paths. Repeat this step to clean up all round corner paths.


5.Apply Gradient


Select the top level paths and apply a yellow-green color gradient.


6.Eyedropper


Select the back(depth) paths, use the Eyedropper tool and click on the front paths. This will copy the gradient fill.


7.Darken


Keep the back paths selected, go to Gradient palette and adjust the gradient colors to a darker tone.


8.3D Logo


You can use this technique to make 3D objects from any shape, text, etc.


Here are the steps:
Apply 3D Extrude & Bevel effect
Expand object
Ungroup object
Apply gradient
Eyedropper gradient fill


More…


Here are more samples I made using the same technique.

Kamis, 02 Juni 2011

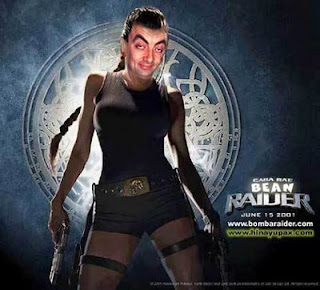
Kumpulan photo lucu mr.bean


sealkazzsoftware.blogspot.com resepkuekeringku.com